As you may know, I have tinkered with FPGA development using the Papilio DUO board before. “Tinkered” is somewhat hyperbolic since I’ve only ever uploaded somebody else’s designs to the board and played around with them. Anyway, I have decided to sit down to systematically learn everything that this development platform has to offer. I think it will be helpful, to myself mainly—but also maybe to others—to document the process.
First of all, here are a couple of photos of what I’ll be talking about:
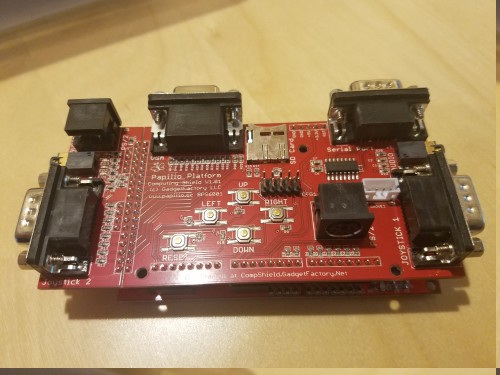
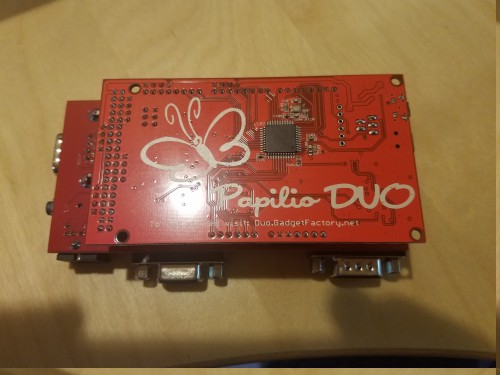
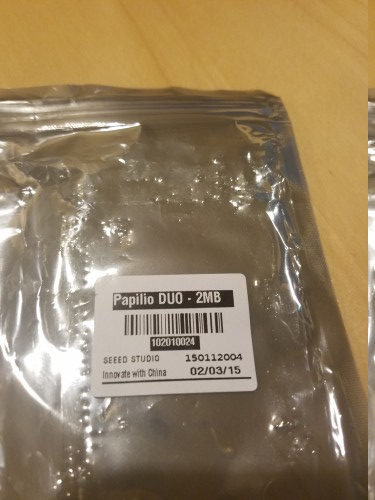
That’s the Papilio DUO with 2 MB of SRAM and the Papilio Classic Computing Shield. I have no idea how current this stuff is. I bought all of this back in 2015.
An important difference from when I originally purchased the Papilio DUO and started playing with it the first time is that I rarely use Windows these days. In fact, I don’t have Windows as the primary operating system on any of my computers. Most of my machines are currently running Ubuntu 18.04. Therefore, the first thing I intend to document is how I get set up on Linux. We’ll start with that today.
Setting the stage
In case it becomes relevant in the future, here are the approximate specs of the machine I will be installing the Papilio development tools on:
- Lenovo ThinkPad T520
- Intel i7-2760QM CPU
- 16 GB RAM
Downloads
All the tutorials for the Papilio DUO that I’ve found online use the following two pieces of software:
Now, until I’ve had more chance to play with these, I can’t be sure exactly how they interact and what each one does. This is something I will write down as I find out.
Installing DesignLab IDE 1.0.8
It looks like this piece of software has received updates within the last three years, so that’s reassuring.
- Go to the download page
- Click the Download this file button
- Select the
DesignLab-1.0.8-linux64.tgzfile from the list - Wait for the download to complete
Once that’s done, we’ll run some commands to extract the tarball and run the installer:
mkdir -p ~/.local
cd ~/.local
tar xvf ~/Downloads/DesignLab-1.0.8-linux64.tgz
cd DesignLab-1.0.8
sudo ./ubuntu-setup.sh
As far as I can tell, this sets up DesignLab to run in place (from $HOME/.local/DesignLab-1.0.8/DesignLab in my case). I then symlinked this to a location on the search path so can launch it directly just by typing DesignLab:
mkdir -p ~/.local/bin
cd ~/.local/bin
ln -sf ~/.local/DesignLab-1.0.8/DesignLab DesignLab
Running DesignLab starts up the product and demonstrates that we have at least some degree of functionality.
Installing Xilinx ISE WebPACK 14.7
This piece of software is deprecated by the manufacturer and superseded by their Vivado tool. Unfortunately, the Papilio DUO is based on the Spartan 6 FPGA (see specs) which is not supported in newer versions of Xilinx’s design software. I believe that ISE 14.7 is the last version to support this FPGA. So, we’ll forge ahead with that:
- Go to the download page
- Click the Full Installer for Linux link
- Wait for the download to complete
After that’s done, we’ll run some commands to extract the tarball and run the installer:
mkdir -p ~/.local
cd ~/.local
tar xvf ~/Downloads/Xilinx_ISE_DS_Lin_14.7_1015_1.tar
cd Xilinx_ISE_DS_Lin_14.7_1015_1
sudo ./xsetup
You’ll need to check the various boxes to agree to the licence agreement and select ISE WebPACK under Select Products to Install and the default options for everything else.
The setup process will install the product under the location /opt/Xilinx/14.7/ISE_DS by default. I believe the executable to start the IDE is at /opt/Xilinx/14.7/ISE_DS/ISE/bin/lin64/ise. I’m going to symlink to this for now:
mkdir -p ~/.local/bin
cd ~/.local/bin
ln -sf /opt/Xilinx/14.7/ISE_DS/ISE/bin/lin64/ise ise
I think it’s safe at this point to remove the extracted contents of the original tarbal:
rm -rf ~/.local/Xilinx_ISE_DS_Lin_14.7_1015_1
Obtaining an ISE licence
Running ise starts up ISE at which point we encounter a complaint about the lack of a licence:
A license was not found for the ‘ISE’ feature.
Typical causes for this error are either that there is no license file found or that license files, which were found, do not contain an unexpired license with the required feature.
The Xilinx License Configuration Manager (XLCM) will be launched to assist you with locating or obtaining a license file.
So, let’s see what that does for us.
The answer is nothing. “XLCM” does not start up. I even tried playing around with /opt/Xilinx/14.7/ISE_DS/ISE/bin/lin64/xlicclientmgr and that didn’t work either. It turns out that the various shell scripts under /opt/Xilinx/14.7/ISE_DS are the key.
Since we’re on 64-bit Linux let’s run settings64.sh:
source /opt/Xilinx/14.7/ISE_DS/settings64.sh
This takes care of adding the directory containing ise and xlcm etc. to the search path. Let’s remove that symlink I created earlier:
rm ~/.local/bin/ise
I will probably revisit how to set up the environment for ISE in the future, but sourcing this shell script seems to do the trick. I restart ISE by typing ise and, lo and behold, the Xilinx License Configuration Manager starts up.
I had previously obtained a licence from the Xilinx licensing web site as per this forum post using an account I created years ago. From the licence page, I noticed that, as if by magic, I already had a licence entitled “ISE WebPACK License” appearing under “Certificate Based Licenses”. I was able to generate a “node-locked” licence as follows:
- Check ISE WebPACK License
- Click Generate Node-Locked License
- Click Next
- Click Next again
At this point Xilinx congratulated me and sent me an e-mail containing an Xilinx.lic attachment. I downloaded this and then imported it from the Manage Licenses tab in XLCM.
At this point I have what looks like a functional and properly-licensed ISE WebPACK.
I hope to have a chance to play with these bits and pieces over the next couple of days!